


Quilt guild challenge finished.

Gabby, Pediatrics cartoon figure
Meet Gabby. Earlier this year I promised I would contribute to a guild challenge for an exhibit that will be displayed at a local children's hospital. The challenge revolved around a set of cartoon characters the hospital created for their decorative theme. I thought it would be easy. Now, over six months later, the task is done, but not without a bit of sturmunddrang (otherwise known as storm and stress).
I don't do cute well. I am a little skittish about pretty too. So, I thought maybe I could do something that would push my patterning skills a bit. I worked on 10-15 different patterns for a quilt top that would house this guy. A new and different nine patch? A log cabin nest? what about a new way of looking at a mariner's compass pattern? None made my brain fizz with excitement.
Then I decided that maybe it could be a collage. I spent a good 10-12 hours fussy cutting bits of fabric that might fit together to represent and house this bird. No song in my heart for that solution either. Falling back on skills I felt most comfortable with, I thought maybe I could just do a whole cloth version of Gabby in black and white. I spent at least a day or two mapping that one out. It's just a little sad seeing a colorful character like this guy go to the dark side....
The next time I went to guild they were selling a bunch of preprinted cartoon characters that could be appliqued onto a top. I thought.....there's my answer! I immediately bought one of the larger versions of Gabby, totally ignoring the fact that I am not good at applique and I still had to come up with a top. Maybe I could do a reverse applique version? I admit that many of my quilts answer the question "Now...how can I hide that mistake?"
Gabby lingered on the design wall for another month. It got so that every time I looked at him I felt a twinge of insecurity and dread.

When I finally had the nerve to go back to the project (since the deadline is creeping up and the last guild meeting reinforced that sense of commitment I had) I decided to read about Gabby a little more and figure out what I should do. I came across this brief summary of his character.
I decided I liked this guy.
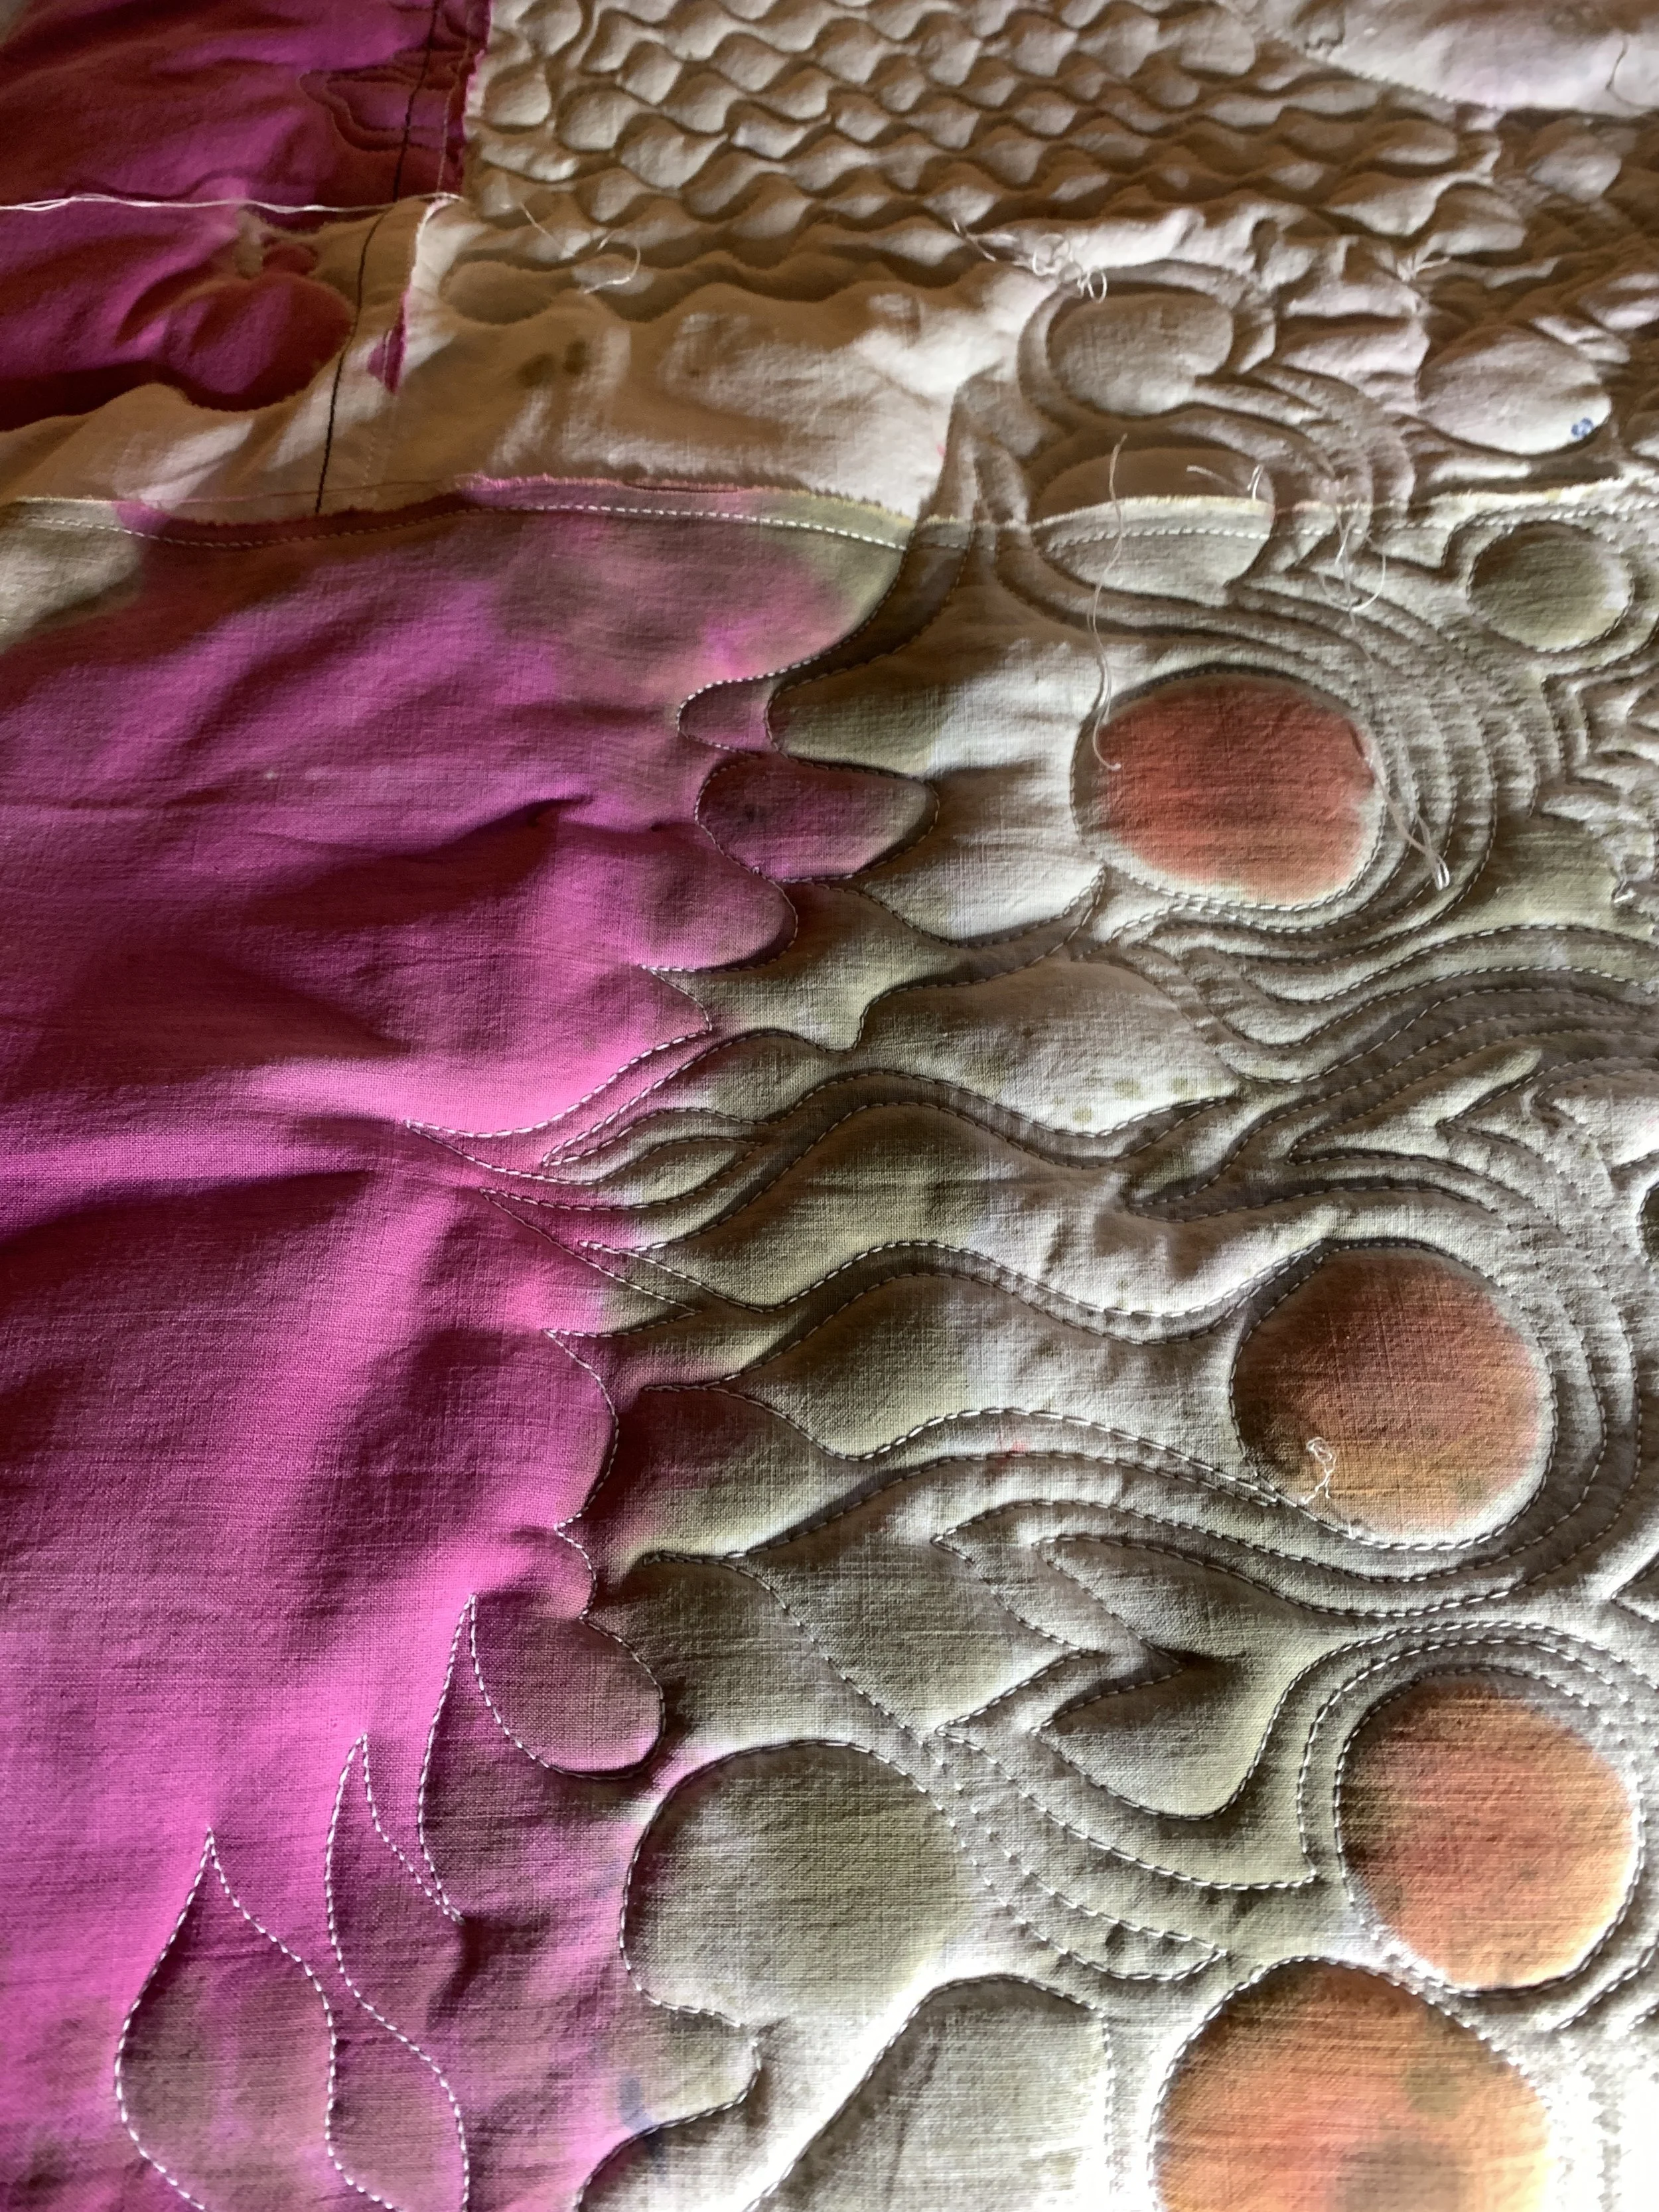
And he needed some camouflage.
I went to my mother's copious stash and found a delightful Asian patterned fabric that complemented his beak. He looked pretty good sitting within the pattern but needed something more. I went to the fabric store and found a (dare I say pretty?) organza with pink flowers scattered over it (have I ever mentioned the fact that pink and I don't really get along very well?). It would work well as a second level of color and camouflage.
So here is my final solution. He is perched on a flower surrounded by flowers. The transparency of the pink-flowered organza allowed me to add some clouds over his head. I stuffed his goofy beak with some extra padding so that he would stand out in a crowd. And, at the end I added the yellow binding and embroidered the X pattern over the squares in yellow orange floss.

Gabby, a loud and happy guy.
Now I can go back to what I really want to do with a sense of accomplishment, and another thing to write on my hand so that I don't forget: Be careful what you promise, it's not all a bed of flowers.


